

IMPROVING DRY BEAN PROCESSING YIELD STARTS WITH THE “IN-BETWEEN” STEPS

Everyone specs the raw beans. Everyone checks the finished pack-out. But yield losses? Those happen in the in-between—hydration variability, non-uniform cook profiles, mechanical damage at transfer points, slow cooling that keeps cooking when you think the process stopped.

Here’s the market reality making this urgent: tighter labor pools, higher ingredient costs, more private-label and ready-meal demand, and a hard shift toward shorter runs, more SKUs, faster changeovers. That combination punishes any system running on “tribal knowledge” settings and manual oversight.

Below are nine concrete, plant-floor levers for improving dry bean processing yield. Written for operations teams running prepared foods, ingredient lines, and cook/chill areas.

1) HYDRATION UNIFORMITY—NOT AVERAGE MOISTURE

One portion of the batch under-hydrated, another over-hydrated? Double hit. Under-hydrated beans split in aggressive cooking. Over-hydrated beans turn mushy and shed solids.

Actionable checks:

  • Track hydration distribution (range/standard deviation), not just the mean
  • Validate soak time/temperature against seasonal raw variability
  • Minimize dead zones in soak tanks; keep turnover consistent

2) CONTROL THE HEAT TRANSFER MODE—STEAM, WATER, OR HYBRID

Yield loss shows up when heating is uneven. Hot spots create skin rupture. Cold spots force longer dwell time that overcooks everything else.

Plant-floor rule: uniform heat transfer = shorter cook time = fewer splits.

What to standardize:

  • Cook water-to-product ratio (or steam injection rate) by recipe
  • Load depth, flow patterns, agitation style
  • Temperature ramp rates—avoid shock heating on fragile varieties

3) SHIFT FROM “TIME-BASED” TO “RECIPE-DRIVEN” COOKING

Many lines run “X minutes at Y°F.” Works fine until the inbound beans change, the batch size changes, or the operator changes.

Recipe-driven approach tightens yield:

  • Define target internal texture endpoints (bite/tenderness) and correlate to process parameters
  • Use repeatable setpoints for temperature, dwell time, flow, discharge speed
  • Reduce operator-dependent variability—critical in today’s labor market

4) REDUCE MECHANICAL DAMAGE AT EVERY TRANSFER

Beans fail mechanically before they fail thermally. Every drop, auger pinch, pump shear point creates splits that become solids loss in washdown and liquid-solid separation.

Practical fixes:

  • Replace high-drop transfers with gentle discharge designs
  • Audit auger flights, transfer chutes, pinch points
  • Use lower-impact conveying after hydration and after cook—highest fragility windows

5) DESIGN FOR CLUMP-FREE COOKING

Clumping forces longer cook cycles and harsher agitation. That compounds splitting.

What reduces clumps:

  • Consistent product flow through the cooker
  • Controlled agitation that moves product without grinding it
  • Uniform water flow that prevents “bean mats” from forming

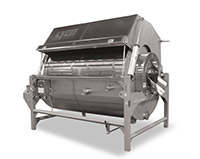
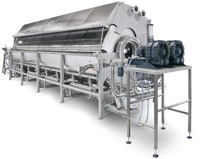
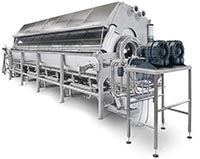
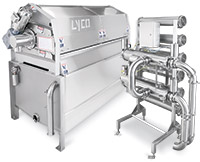
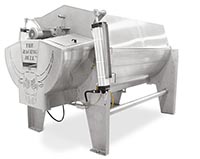
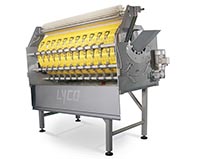
Lyco Manufacturing’s perspective: uniform flow patterns matter as much as temperature. Especially for dense products like beans where localized packing drives uneven cooking. Over 2,300 Lyco cookers and coolers installed worldwide address this with patented Hydro-Flow® technology.

6) COOL FAST ENOUGH TO STOP COOKING—NOT JUST TO MEET HACCP

Major hidden yield leak: carryover cooking. Beans continue softening and shedding solids while coasting down in temperature.

Best practice:

  • Move from cook to rapid cooling with minimal hold time
  • Target sub-40°F cooling where product and regulatory requirements demand it
  • Use cooling that doesn’t add mechanical stress or excessive turbulence

This is where two-stage approaches like Cook-Chill or Cook-Quench-Chill become operationally relevant. Processors want speed and repeatability without extra equipment and labor.

7) TREAT “YIELD” AS BOTH WEIGHT RECOVERY AND GRADE RECOVERY

Many plants track yield as pounds out vs. pounds in. For beans, grade recovery matters: whole beans vs. splits vs. fines.

Track both:

  • Weight yield (% mass recovery)
  • Whole-bean recovery (% whole, % splits, % fines)
  • Solids loss (ppm/TSS in process water; screen captures)

8) CLEANABILITY AND CHANGEOVER SPEED ARE YIELD FACTORS

In multi-SKU plants, slow changeovers increase rework, start-up scrap, and “mystery loss” between products.

Yield-protecting changeover habits:

  • Standardize sanitation steps (time, chemical, verification points)
  • Use equipment designed for access, drainage, predictable CIP where applicable
  • Reduce manual interventions that cause product damage and variability

9) CONNECT COOKING AND LIQUID-SOLID SEPARATION INTO ONE YIELD STORY

Solids loss doesn’t only come from broken beans—it becomes a wastewater and screening problem.

Operational takeaway:
If screens are catching more fines this month, your “yield problem” might be upstream in hydration, cooking uniformity, or mechanical handling—not the screen itself.

Internal linking opportunities:

  • Versa-Flow™ Cooker Cooler pages for cook/chill process control and changeover flexibility
  • Lyco’s wastewater screening / liquid-solid separation content for managing fines and solids capture downstream

PRACTICAL TAKEAWAYS (WHAT TO DO THIS WEEK)

  • Audit your top (5) split-causing transfer points. Measure drop heights and pinch zones.
  • Add one metric: whole-bean recovery % alongside total yield.
  • Validate cooling time-to-temperature. Look for carryover cooking in hold bins.
  • Convert “tribal knowledge” settings into repeatable recipes tied to inbound bean variability.

NEXT STEP

Mapping a yield-improvement plan? Want to sanity-check cook/chill flow, cooling rates, and gentle handling options for beans? Contact us by filling out the form below.

PREVENTING PASTA CLUMPING IN FOOD PROCESSING: WHY “GOOD PASTA” FAILS ON THE PLANT FLOOR

Here’s what we see over and over: a processor sources quality pasta, dials in the cook time, and still ends up with clumped product that jams the filler and throws off package weights. The pasta isn’t the problem. The process is.

Preventing pasta clumping in food processing comes down to three variables working together—process timing, starch management, and handling energy. When throughput increases, labor gets tight, and SKU changeovers speed up, those variables drift. That’s when clumping shows up.

The market is pushing hard toward prepared meals, refrigerated kits, and IQF-ready components. That means more cook/chill and cook-quench-chill workflows—exactly where pasta is most likely to bridge, mat, and shear.

On the floor, clumping creates three expensive problems:

  • Yield loss (breakage, fines)
  • Rework (manual breaking, re-rinsing)
  • Inconsistent downstream filling (weight drift, poor sauce adhesion, package voids)

ROOT CAUSES: WHERE PASTA CLUMPS IN A COOK/CHILL LINE

We’ve troubleshot hundreds of pasta lines. Most clumping events trace back to one or more of these conditions:

1) SURFACE STARCH ISN’T MANAGED

  • Over-aggressive cooking, long dwell, or hot spots increase starch release
  • Insufficient wash/quench action leaves a tacky layer that bonds piece-to-piece
  • Water quality drift (hardness, temperature, carryover solids) changes starch behavior shift-to-shift

2) TRANSITION TIME IS TOO LONG (COOK → COOL)

Pasta clumps when it sits warm and wet in a low-motion zone. Discharge chutes, hoppers, dead legs, undersized conveyors, waiting for the next step—these are clump incubators.

3) HANDLING ENERGY IS WRONG (TOO MUCH OR TOO LITTLE)

  • Too little motion = bridging and matting
  • Too much mechanical agitation = surface damage, more starch release, more tack

4) CHANGEOVERS CREATE “HIDDEN” CLUMPING CONDITIONS

Faster SKU turns are the reality now. But short-clean practices leave behind residual starch film, fats/oils from prior products, and temperature setpoints that don’t match the next pasta cut. We’ve seen plants chase clumping for hours before realizing the prior product set them up for failure.

AN OPERATOR-MINDED CONTROL PLAN (WHAT TO ADJUST FIRST)

CONTROL #1: SET A STARCH BUDGET, NOT JUST A COOK TIME

Forget targeting “al dente” alone. Track an operating signal tied to clumping risk:

  • Turbidity / solids in cook water and quench water (trend over the shift)
  • Product surface tack and discharge behavior (does it free-flow or rope?)
  • Breakage rate at transfer points

What this means on the floor: When starch load rises, clumping follows—often 10–30 minutes later as the line warms up and carryover increases. By the time you see clumps, the starch spike happened two batches ago.

CONTROL #2: SHORTEN THE WARM, WET WINDOW

Clumping accelerates when pasta stays in the critical tack zone before cooling. Food safety expectations are tighter than ever—plants need fast temperature pull-down to sub-40°F for both quality and shelf-life stability.

What this means on the floor: Reduce queue time, eliminate dead zones, and prioritize equipment that moves product continuously through cooling with minimal hold-up. Every minute of warm, wet dwell is working against you.

CONTROL #3: USE GENTLE, UNIFORM AGITATION THAT PREVENTS “ROPE” FORMATION

The goal is piece separation without surface damage. We see plants chase separation with aggressive paddles or high-drop transfers that actually create more starch and more clumping. It’s counterproductive.

What this means on the floor: Uniform hydraulic movement (vs. mechanical abuse) is typically the cleaner path for delicate shapes, fresh pasta, and filled products. Let the water do the work.

CONTROL #4: STANDARDIZE CHANGEOVER SETTINGS WITH RECIPE CONTROL

With more co-manufacturing and SKU proliferation, recipe-driven setpoints are becoming standard: cook temperature, dwell time, agitation intensity, quench rate, and cooling profile.

What this means on the floor: Treat pasta changeover like a validated process, not an operator art project. Documented setpoints, verified water temperature, verified discharge flow—every time.

INDUSTRY EXAMPLES: WHAT “CLUMPING” LOOKS LIKE IN REAL OPERATIONS

  • Prepared meal components (macaroni, penne): Clumps form in the first cooling transfer, then break into irregular chunks that fill inconsistently and over/under-sauce in tray lines. Downstream gets the blame, but the clump was born upstream.
  • Fresh/refrigerated pasta: Delicate surfaces smear under mechanical handling. Tack increases. Yield loss shows up as fines and mushy texture that customers reject.
  • Cooked pasta for IQF: Poor separation pre-freeze causes clusters that don’t freeze uniformly. Customer complaints come back as “pasta bricks” that won’t portion correctly.

WHERE EQUIPMENT DESIGN MATTERS

Preventing pasta clumping in food processing is fundamentally about uniform cooking + controlled quench + rapid cooling + gentle handling in one coordinated flow path. That’s why many processors are consolidating steps instead of stacking standalone units that create dead zones and transfer damage.

Lyco Manufacturing’s perspective: uniform agitation and consistent thermal processing reduce starch-driven adhesion, and recipe-driven controls reduce operator variability. We’ve built over 2,300 systems with this approach.

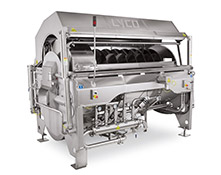
If you’re comparing equipment approaches, look at integrated cook/chill designs like the Versa-Flow™ Cooker Cooler (Cook-Chill and Cook-Quench-Chill capability) and related continuous systems.

Related resources:

  • Versa-Flow™ Cooker Cooler
  • Combination Cooker-Cooler
  • Hydro-Flow® technology overview

QUICK CHECKLIST: TROUBLESHOOTING PASTA CLUMPING IN 30 MINUTES

  • Verify cook exit temperature, dwell time, and water solids trend
  • Confirm quench/cooling water temperature and flow, check for clogged screens
  • Inspect discharge and first transfer for dead zones and product pile-up
  • Reduce mechanical shear points, confirm gentle agitation where separation is needed
  • Lock recipe setpoints for each cut (elbows ≠ penne ≠ shells)

NEXT STEP

If you want a process-focused conversation about preventing pasta clumping in food processing—cook/chill layouts, water/starch management, changeover practices—we’re here to help.

COMMERCIAL DRY BEAN SOAKING PROCESS: WHAT “GOOD” LOOKS LIKE ON THE PLANT FLOOR

A commercial dry bean soaking process isn’t “just adding water.” It’s a controlled hydration step that sets the ceiling on blanching performance, cooker throughput, split rate, texture, yield, and wastewater loading. We see it constantly: plants chase cooker problems when the real issue started two steps earlier in the soak tank.

Today’s operating environment—tight labor, higher utility costs, SKU proliferation, stronger food safety scrutiny—is forcing processors to revisit soak fundamentals. The goal: stabilize output and reduce operator dependency before product ever hits the blancher.

This article breaks down the soaking process from an operations and engineering standpoint. What to measure. What typically goes wrong. What to standardize so your blanchers, cookers, coolers, and screens run predictably.

WHY SOAKING IS GETTING MORE ATTENTION RIGHT NOW

Across North American bean and ready-meal lines, the “soak step” is getting pulled into continuous improvement projects for three reasons:

  • Throughput and capacity constraints: Soak variability becomes cooker bottlenecks, more rework, and less effective line balancing. If hydration is inconsistent, your cooker can’t hold a steady retention time.
  • Energy and water inflation: Over-soaking and excessive dump-and-fill cycles inflate water use, heating load, and wastewater surges. That shows up on the utility bill and in compliance reports.
  • Food safety and sanitation expectations: Auditors and customers demand more documented controls around time/temperature, allergen segregation, and hygienic design. “We’ve always done it this way” doesn’t pass anymore.

COMMERCIAL DRY BEAN SOAKING PROCESS: CORE VARIABLES TO STANDARDIZE

Predictable hydration means predictable downstream cooking. These variables must be controlled and recorded—not left to operator judgment.

1) WATER-TO-BEAN RATIO (AND TRUE UNIFORMITY)

Operators know the rule of thumb. Plants struggle with consistency. Non-uniform distribution causes:

  • zones of under-hydrated beans (hard centers, longer cook times),
  • zones of over-hydrated beans (split skins, mushy texture),
  • unstable discharge flow into blanching/cooking.

Practical takeaway: Standardize fill volumes and loading methodology. Verify distribution (not just level). Prevent “piling” that creates hydration gradients.

2) TIME AND TEMPERATURE (THE TWO BIG LEVERS)

Time and temperature drive hydration rate. They also influence:

  • microbial growth risk windows,
  • texture development,
  • skin integrity and split rate.

Practical takeaway: Define a target soak window by bean type. Control temperature tightly enough that “summer vs. winter” water temperature doesn’t shift your cook profile.

3) BEAN VARIETY, AGE, AND INBOUND MOISTURE (RAW MATERIAL REALITY)

Crop year variability and storage conditions change hydration curves. If your incoming dry beans swing in initial moisture, size distribution, or defect load, your soak “recipe” must anticipate it.

Practical takeaway: Treat incoming moisture and defect % as process inputs, not “quality notes.” Trend these values. Preemptive adjustments beat chasing problems after the cooker goes unstable.

4) AGITATION AND GENTLE HANDLING

Aggressive agitation increases splits. Too little movement causes channeling and uneven hydration. The plant-floor problem shows up later as:

  • clumping in blanchers/cookers,
  • uneven thermal processing,
  • higher fines loading in liquid-solid separation.

Practical takeaway: Uniform bean contact with water, without mechanical abuse—especially with delicate varieties.

WHAT “BAD SOAKING” LOOKS LIKE DOWNSTREAM (AND HOW IT SHOWS UP IN DATA)

Soak issues rarely stay in the soak area. They propagate.

  • Cooker retention time creeps up → capacity loss, scheduling pressure.
  • Texture complaints increase → more QA holds, rework, customer rejects.
  • Cooling becomes inconsistent → greater risk staying above critical temperatures longer than planned.
  • Wastewater solids rise → more screen blinding, higher disposal costs, potential compliance headaches.

If you track only “soak time,” you miss the story. Track outcomes:

  • split rate (%),
  • hydrated yield (% gain),
  • cooker setpoint vs. achieved texture,
  • fines and solids loss.

SANITATION AND HYGIENIC DESIGN: THE SOAK STEP’S HIDDEN COST CENTER

Soak systems often become:

  • hard-to-drain,
  • hard-to-access,
  • prone to residue accumulation.

That drives labor hours and increases sanitation variability.

Practical takeaway: Look for self-draining geometry, cleanable corners, and predictable discharge. Less trapped water equals less downtime and fewer sanitation surprises.

PROCESS IMPROVEMENT CHECKLIST (HIGH IMPACT, NO CAPITAL REQUIRED)

If you’re evaluating your commercial dry bean soaking process, start here:

  1. Define hydration targets by SKU (moisture gain or texture proxy).
  2. Lock in water-to-bean ratio and loading procedure.
  3. Control soak temperature with a documented tolerance band.
  4. Reduce operator variation with simple, visual standards.
  5. Measure splits, yield gain, and solids loss weekly—trend them.
  6. Confirm downstream equipment is matched to the hydration profile.

HOW SOAKING CONNECTS TO BLANCHING, COOKING, AND COOLING

Most plants evaluate soaking in context of the whole line:

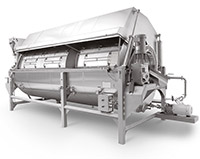
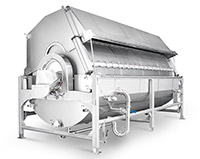
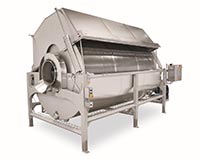
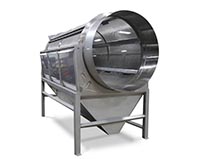
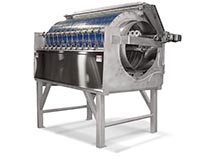
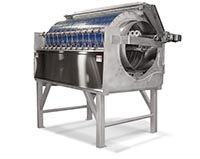
  •  Continuous Hydrating with Blanching/cooking: Consistent hydration supports stable retention time control and uniform thermal processing. The Rotary Drum Blancher® handles 2–60 minute retention times with gentle agitation and uniform temperatures—over 850 sold worldwide.
  • Soak/cook discharge → Screening: Splits and fines become wastewater solids. Better soaking means less screen blinding and lower disposal costs.

Rotary Drum vs Belt Cooler for Pouches: What Fits?

ROTARY DRUM VS BELT COOLER FOR POUCHES: WHAT FITS YOUR LINE?

Food safety, shelf-life, pouch integrity, and throughput collide at one place: the cooling step after hot-fill or cook-in-pouch. When processors compare rotary drum vs belt cooler for pouches, they’re solving the same plant-floor problems—core temperature misses, crushed seals, uneven dwell, bottlenecks, and documentation gaps that show up during audits.

The comparison matters more now than five years ago. Higher SKU counts (more pouch sizes, more run changes), tighter FSMA/HACCP verification expectations, rising water/energy scrutiny, and labor shortages that punish equipment requiring constant babysitting—all of it pushes cooling decisions to the front of the line.

Below is a practical framework to help engineering and quality teams evaluate options without over-committing to a specific design too early.

WHAT YOU’RE REALLY CHOOSING: DYNAMICS, NOT JUST HARDWARE

A “rotary drum cooler” and a “belt cooler” represent two different cooling philosophies:

  • Rotary drum pouch cooling relies on tumbling/rotation for movement and mixing, with cooling water contacting the pouch exterior
  • Belt pouch cooling uses a conveyor with water deluge or immersion sections, moving pouches in a linear path

The decision comes down to whether the system can consistently deliver:

  • Repeatable dwell time—even during upstream/downstream disturbances
  • Uniform heat transfer—especially with viscous fills (soups, sauces, chowders, pet food loaf)
  • Low-damage handling—protecting seals, spouts, and film layers
  • Verifiable metrics—for process validation and audit-readiness

BELT COOLERS: WHERE THEY FIT, WHERE THEY STRUGGLE

COMMON STRENGTHS

  • Straightforward to understand and service (familiar conveyor architecture)
  • Simple integration into existing line layouts
  • Works when products are robust and dwell precision is not critical

COMMON PLANT-FLOOR ISSUES

1) Non-uniform cooling across the bed
Belt loading creates “hot spots” when pouches overlap, raft, or ride on top of each other. With multiple pouch sizes, this happens more often than operators expect.

2) Flow is not always true FIFO
If the belt becomes congested or pouches shift, residence time distribution widens—some pouches cool longer, others shorter. That’s a quality and documentation issue, not just an efficiency issue.

3) Pouch handling stress
Deluge + belt transfers introduce scuffing, seal abrasion, or corner damage—especially with high throughput and frequent starts/stops.

4) Validation friction
When auditors ask, “Show me the coldest pouch and prove your dwell time,” belt systems require extensive mapping to characterize worst-case conditions.

PRACTICAL TIP: If a belt cooler is in the running, define maximum allowable overlap, verify belt speed stability under load, and plan for routine belt/nozzle maintenance as a control point—not a “nice-to-have.”

ROTARY DRUM COOLERS: WHERE THEY FIT, WHERE THEY STRUGGLE

COMMON STRENGTHS

  • Strong mixing action in the cooling medium can improve external heat transfer
  • Potentially compact, depending on configuration and dwell needs
  • Effective for consistent pouch geometry and predictable loading

COMMON PLANT-FLOOR ISSUES

1) Product/pouch sensitivity to tumbling
Some pouch formats (spouts, fitments, thin films, sharp corners) don’t tolerate aggressive motion. Damage shows up as micro-leaks, seal stress, or cosmetic issues that become customer complaints.

2) Residence time control varies with loading
If the drum’s internal dynamics change with fill level, dwell distribution widens—raising the “coldest pouch” challenge.

3) Sanitation and inspection access
Rotary designs can be cleanable, but access and verification must be designed-in. If sanitation is a daily constraint, this is a real decision factor.

PRACTICAL TIP: Ask early how the system manages “line upsets”—when upstream surges or downstream pauses happen, what protects dwell time consistency and pouch integrity?

WHAT PROCESSORS ARE PRIORITIZING IN 2026

Across food and pet food, cooling decisions center on:

  • Audit-ready process evidence (time/temperature, worst-case pouch, documented control limits)
  • Energy and water accountability (utilities cost, internal sustainability metrics, discharge pressure)
  • High-mix operations (multiple pouch sizes, multiple viscosities, more changeovers)
  • Labor-minimizing reliability (equipment that doesn’t require constant adjustment to stay within spec)

This is why engineering teams are moving from “cooler as a conveyor” thinking to “cooler as a controlled thermal process” thinking.

A THIRD PATH: CONTROLLED SUBMERGED AGITATION

Lyco Manufacturing’s position is direct: the core problem with many traditional designs isn’t speed—it’s repeatable, uniform cooling through the bacterial danger zone, with controlled pouch handling and measurable performance.

Systems like Chill-Flow™, using patented Hydro-Flow® submerged agitation, are evaluated as an alternative to both deluge belts and drum-style dynamics because they deliver:

  • True first-in/first-out flow
  • Water-cushioned handling to reduce pouch damage
  • Uniform, rapid cooling across pouch sizes
  • Smaller footprint relative to long belt runs

We design and manufacture these systems with decades of pouch cooling experience—and we back it with R&D test runs using customer products before a line is committed.

DECISION CHECKLIST: ROTARY DRUM VS BELT COOLER FOR POUCHES

Use this as a scoping tool before you talk equipment specifics:

PROCESS + FOOD SAFETY

  • What is the required core temperature at discharge, and how tight is the tolerance?
  • What is the maximum allowed time in the danger zone for your product category?
  • How will you identify and validate the coldest pouch?

PRODUCT + PACKAGE

  • Pouch sizes (minimum/maximum), fill weights, viscosities
  • Seal type, spouts/fitments, film robustness, cosmetic requirements
  • Damage definition: leak rate target, seal burst targets, scuff tolerance

OPERATIONS

  • Throughput (pouches/min), shift pattern, sanitation windows
  • Changeover frequency, SKU mix, line upset frequency
  • Maintenance realities: nozzles, belts, bearings, access panels

UTILITIES + FOOTPRINT

  • Available space and elevation constraints
  • Water reuse strategy, filtration needs, discharge limits
  • Heat recovery opportunities

PRACTICAL TAKEAWAYS

  • If you need simple conveyance cooling and can tolerate wider dwell variation, a belt cooler may fit—provided you tightly control loading and maintenance.
  • If you have consistent pouch formats and can validate motion effects on seals and cosmetics, a rotary drum can be effective—provided dwell control under variable load is understood.
  • If your drivers are uniformity, FIFO, gentle handling, and validation-ready metrics, benchmark both against controlled submerged agitation designs.

RTE FOOD PROCESSING SANITATION: WHAT’S BREAKING, WHAT’S WORKING, WHAT TO FIX FIRST

We’ve watched sanitation become the bottleneck nobody planned for. More SKUs, more allergens, shorter runs, tighter verification—and the same crew trying to execute more changeovers per shift. The plants pulling ahead aren’t cleaning harder. They’re engineering sanitation into the process, eliminating harborage points, reducing open handling, and deploying CIP where it actually delivers measurable downtime reduction.

Here’s a plant-floor playbook that maps directly to the biggest sanitation pain points in RTE pasta, rice, vegetables, beans, and protein components.

WHY RTE SANITATION PRESSURE IS TRENDING UP (RIGHT NOW)

Operations teams are reacting to forces we see in every plant visit:

  • SKU proliferation + co-manufacturing reality—more product varieties per line per day, more changeovers, more label risk
  • Allergen management complexity, especially in mixed portfolios (dairy, egg, wheat/gluten, soy)
  • Heightened verification expectations—environmental monitoring programs (EMPs), ATP + microbiological confirmation, digital traceability
  • Water and wastewater constraints—higher costs, discharge limits, screening needs tied to starch, fines, FOG, and breading solids
  • Labor shortages—fewer skilled sanitation techs, more reliance on repeatable systems, checklists, and automation

The result: sanitation is now a throughput constraint, not just a compliance function.

THE TOP 7 RTE SANITATION FAILURE MODES (AND HOW TO ENGINEER THEM OUT)

If you’re seeing long cleanups and inconsistent verification, it’s usually one (or more) of these:

  1. Clumping and product hang-up in cookers, coolers, dead legs, transitions, and discharge chutes
  2. Starch and protein soils baking on in hot zones (cook, blanching, rehydration)
  3. Harborage points—threads, hollow sections, non-drainable framing, gasketed joints that don’t get flow
  4. Mixed clean methods (manual foam + partial CIP) leaving “shadow zones”
  5. Allergen cross-contact risk driven by incomplete disassembly or poor CIP coverage
  6. Water management gaps—overspray, pooling, aerosol risk, poor drainage slope
  7. Verification mismatch—ATP pass but micro fails because soils were removed, not contamination sources

Actionable takeaway: Start with a line walk focused on drainability, access, coverage, and changeover steps—then design out the steps that create variance.

CLEANING TIME IS A DESIGN PROBLEM: 5 HYGIENIC DESIGN LEVERS THAT CUT DOWNTIME

Sanitation labor doesn’t scale. Equipment design does. These (5) levers consistently reduce clean time and rework:

1) DRAINABILITY AND “NO WATER TRAPS”

  • Continuous slope to drain, no flat ledges, no “cups,” no unsealed tubing ends
  • This matters most around cookers, coolers and screens, where warm water + nutrients drive rapid risk

2) CLEAN-IN-PLACE (CIP) COVERAGE

CIP works when you control:

  • Flow, velocity, turbulence, temperature, chemistry, time
  • Spray device placement and return routing so you’re not just rinsing the easy surfaces

Plants moving from manual cleaning to validated CIP see the biggest gains in repeatability, not just minutes saved.

3) SHORTER CHANGEOVERS WITH FEWER OPEN SURFACES

Every time a system is opened, you add:

  • Reassembly variability, gasket seating risk, and post-clean handling exposure

Design for fewer open steps, faster verification, and less “human-in-the-loop.”

4) SOIL REDUCTION UPSTREAM (YES, IT COUNTS AS SANITATION)

Uniform processing reduces the mess:

  • Less overcooked starch = less paste
  • Less breakage = fewer fines into drains and screens
  • Less sticking = less scraping and less aggressive cleaning

This is where continuous systems with controlled agitation and gentle handling matter—especially for pasta and rice.

5) SANITATION-INFORMED UTILITIES: WATER, AIR, DRAINAGE

  • Separate low-care/high-care air patterns
  • Control overspray and pooling
  • Put real attention on liquid-solid separation (screens, strainers, wastewater screening) to keep solids out of drains and reduce backups

ALLERGEN CHANGEOVERS: BUILD A “PROOF, NOT PROMISE” SANITATION ROUTINE

If you’re running multiple SKUs on the same line in a day, you need allergen changeovers that are:

  • Defined (sequence + setpoints)
  • Executable (time and labor realistic)
  • Verifiable (swabs, rapid tests, documentation)

Practical structure:

  • Dry removal first (scrape/collect solids before water)
  • Targeted pre-rinse to move bulk soils out
  • Detergent wash tuned for starch/protein/fat soil type
  • Validated CIP loops where possible
  • Post-clean inspection + verification (ATP for cleanliness, allergen swabs for risk)

INTERNAL LINKING OPPORTUNITIES (FOR READERS BUILDING A SANITARY LINE)

When RTE sanitation is the goal, sanitation strategy and processing equipment strategy can’t be separate. For additional context, readers typically review:

  • Continuous cooking/cooling approaches for multi-SKU operations (see Clean-Flow® and Versa-Flow™)
  • High-throughput blanching/cooking with sanitary access (see Rotary Drum Blancher—over 450 installations worldwide)
  • Consolidating cook + cool into one CIP-managed system (see Combination Cooker-Cooler)
  • Ultra-fast cooling to stop the cook and reduce stickiness (see Easy-Flow Cooler)

PRACTICAL TAKEAWAYS: WHAT TO DO IN THE NEXT 30 DAYS

  • Map your top (3) changeovers, time each step, identify the “variance steps” (the ones different people do differently)
  • Identify the top (10) sanitation pain points and classify them: design, procedure, verification, utilities
  • Audit drainability and access around cook/cool zones and transitions
  • Tie EMP findings back to equipment zones, not just rooms
  • Quantify water use and wastewater solids load during changeovers—sanitation cost is often hiding there

READY TO MAP SANITATION CONSTRAINTS TO PROCESS DESIGN?

If you’re evaluating how to reduce RTE sanitation downtime without compromising food safety, we can help you map sanitation constraints back to process design, CIP coverage, and changeover architecture.

POUCH COOLING METHODS FOR FOOD PROCESSING: WHAT ACTUALLY WORKS ON YOUR LINE

Hot-filled pouches solve a lot of problems—labor, packaging cost, distribution flexibility—but they create one requirement you cannot negotiate: rapid, controlled cooling through the bacterial danger zone. If your core temperature profile drifts, you’re chasing shelf-life variability, quality defects (fat separation, starch breakdown, texture loss), and validation paperwork that never quite closes out.

This is a plant-floor guide to pouch cooling methods for food processing. What they are. Where they fit. Where they fail. And what your engineering and QA teams should measure before locking in a line design.

WHY POUCH COOLING IS GETTING MORE ATTENTION NOW

Market pressure is pushing processors toward tighter cooling control, better documentation, and lower operating cost—all at once:

  • FSMA preventive controls + customer audits: Cooling steps must be measurable, repeatable, documented. Not “we’ve always done it this way.”
  • Higher pouch SKU counts: More sizes, more fill weights, more viscosities (soups vs. sauces vs. gravies vs. pet food slurries). More changeover exposure.
  • Energy and water scrutiny: Sustainability reporting, municipal water constraints, rising utility costs. Cooling systems have to show real efficiency numbers.
  • Labor constraints: Manual tote/tank handling is harder to staff and harder to run consistently shift after shift.

Result: More teams are re-evaluating legacy systems (static tanks, deluge belts) and looking for uniform, verifiable core cooling with less footprint.

THE 5 MOST COMMON POUCH COOLING METHODS (AND HOW TO CHOOSE)

1) STATIC TANK COOLING (BATCH OR SEMI-BATCH)

What it is: Pouches placed in racks or baskets, lowered into a tank, cooled over time.

Where it fits:

  • Low volume, long dwell time acceptable
  • Limited automation requirements
  • Minimal capital budget

Common failure modes:

  • Non-uniform cooling—outer pouches cool faster than inner layers
  • Poor FIFO control—first-in/first-out is difficult to guarantee
  • Handling damage: stacked loads, abrasion, seal stress

Plant-floor reality: If your QA team keeps chasing variability in core temperature logs, static tanks are often the root cause. Not the operators.

2) WATER DELUGE BELT COOLING

What it is: Pouches travel on a conveyor while water sprays/deluges over the product.

Where it fits:

  • Flat pouches, limited thickness variation
  • Moderate throughput where footprint is available

Common failure modes:

  • Shadowing and channeling—water does not contact every pouch surface uniformly, especially on overlapped product
  • Temperature gradients persist in thick-fill pouches
  • Seal/scuff risk on belts, transfers, accumulation points

Plant-floor reality: Deluge belts look “simple” until you add SKU variety or push rate. Then the uniformity problem shows up.

3) SPIRAL COOLING / SPIRAL FREEZER AS “COOLING”

What it is: Using a spiral system (often designed for chilling/freezing) as a pouch cooling step.

Where it fits:

  • Spiral already installed, pouch format compatible
  • Surface cooling adequate, core cooling demands modest

Common failure modes:

  • Mismatch between heat transfer need and system design—air-based cooling struggles with fast core pull-down on dense, liquid fills
  • Large footprint and maintenance overhead
  • Product handling risk at infeed/outfeed transfers

Plant-floor reality: Spirals often cool surfaces well but leave core temperature lagging. That’s more time in the danger zone than your validation plan accounts for.

4) IMMERSION COOLING (CONTINUOUS SUBMERGED CONVEYING)

What it is: Pouches conveyed through a submerged water environment. Heat transfer driven by full water contact.

Where it fits:

  • High-volume pouch lines needing consistent cooling
  • Dense fills where core temperature control matters
  • Multi-size pouch programs requiring gentle handling

Common failure modes (in basic immersion designs):

  • Weak agitation → boundary layer stays intact → slower cooling
  • Poor tracking/FIFO if product floats, overlaps, or recirculates
  • Hard-to-verify uniformity if flow is inconsistent

Plant-floor reality: Immersion is the right direction for heat transfer. Performance depends entirely on agitation, flow pattern, and true FIFO control.

5) AGITATED IMMERSION (HIGH-UNIFORMITY, FAST CORE PULL-DOWN)

What it is: Submerged pouch conveying paired with engineered water movement designed to break the boundary layer and drive uniform heat transfer.

Why it’s trending: Teams are prioritizing faster, more uniform cooling with verifiable metrics while reducing damage and footprint.

What to look for:

  • Documentable core temperature pull-down by pouch size/fill weight
  • True first-in/first-out flow—not “mostly FIFO”
  • Gentle handling: water-cushioned conveyance, low-abrasion transfers
  • Controls and instrumentation designed for validation and audits

Lyco’s approach: Chill-Flow™ is built around patented Hydro-Flow® submerged agitation, water-cushioned handling, and true FIFO movement. Uniform, rapid passage through the danger zone is where safety, quality, and shelf life are won or lost.

WHAT ENGINEERING + QA SHOULD MEASURE (NOT GUESS)

To evaluate pouch cooling methods for food processing, align on measurable requirements:

  • Core temperature at discharge (by SKU, worst-case fill, thickest pouch)
  • Time/temperature profile through the danger zone
  • Uniformity across lanes, across the belt/bed, across batch positions
  • Pouch integrity metrics: burst rates, seal peel performance, scuffing, abrasion
  • Water and energy consumption per lb/kg of finished product
  • Footprint per lb/hr (kg/hr) of throughput
  • Cleanability and sanitation time (drains, access, biofilm risk points)

INTERNAL LINKING OPPORTUNITIES (NATURAL NEXT READS)

If you’re mapping the full line, these topics usually come next:

  • How hot-fill parameters affect downstream cooling stability (fill temp, headspace, pouch thickness)
  • Designing for process validation (sensor placement, data capture, audit-ready records)
  • Integrating cooling with upstream cookers, coolers and screens where applicable (system-level thinking)

PRACTICAL DECISION RULES (FAST FILTER)

  • High SKU variety + high throughput → prioritize continuous immersion with engineered agitation
  • Can’t prove uniform core temperature across the load → static tanks and basic deluge designs are likely your bottleneck
  • Pouches showing scuffing, seal failures, corner wear → handling method matters as much as cooling rate

PROCESS-CONTROLLED SOAKING — THE FASTEST PATH TO IMPROVING DRY BEAN HYDRATION EFFICIENCY

WHY “HYDRATION EFFICIENCY” IS A PLANT-FLOOR KPI NOW

Food manufacturers are getting hit from both sides: tighter yield expectations and higher utility costs, plus growing market demand for beans in ready meals, plant-based proteins, and value-added ingredient packs. On the processing floor, that pressure shows up as the same repeat problems—inconsistent soak pickup, blowouts and splits, variable cook times, unpredictable throughput, and high wastewater load from starch and solids carryover.

When operations teams talk about improving dry bean hydration efficiency, they’re usually chasing four outcomes:

  • Faster target moisture pickup (less soak time, less WIP)
  • More uniform hydration across the tank (fewer over/under-soaked beans)
  • Higher yield and better texture after blanching, cooking, and cooling
  • Lower water, energy, and labor per pound of finished product

THE CORE VARIABLES THAT DRIVE HYDRATION (AND WHY THEY DRIFT)

Hydration isn’t “set it and forget it.” It’s a controlled unit operation where small drift creates big downstream variability.

1) WATER-TO-BEAN RATIO AND DISTRIBUTION

Too tight, and you create localized concentration gradients, uneven swelling, hot/cold zones, and inconsistent pickup. Too loose, and you pay for water, heating, pumping, and wastewater handling without gaining uniformity.

Actionable takeaways:

  • Standardize a water-to-bean ratio by variety—navy vs. kidney vs. garbanzo behave differently
  • Use tank geometry and loading practices that eliminate “bean hills,” dead zones, and compaction

2) TIME-AT-TEMPERATURE (SOAK TEMPERATURE STABILITY)

Hydration rate accelerates with temperature, but instability drives non-uniform pickup and increases split risk. Many plants see temperature drift due to make-up water additions, shift changes, or inconsistent heating practices.

Actionable takeaways:

  • Treat soaking like a controlled cook step: target temperature, allowable band, time-in-band
  • Track soak tank temperature at multiple points, not just one measurement location

3) BEAN QUALITY VARIABILITY (INCOMING MOISTURE, AGE, STORAGE)

Crop year, storage conditions, and initial moisture content can swing hydration behavior significantly. This is where “same settings, different outcome” comes from.

Actionable takeaways:

  • Record incoming lot moisture and adjust soak time/temperature using a simple rule set
  • Build an operator-facing “recipe card” approach: variety + lot + target pickup

4) SANITATION, BIO-LOAD, AND TANK TURNOVER

Longer soaks, warm water, and organic load create predictable sanitation risk. The market is trending hard toward documented sanitation controls, allergen changeover discipline, and audit-ready records—bean operations aren’t exempt.

Actionable takeaways:

  • Design for fast dump, self-drain, and clean access; reduce harborage points
  • Define tank turnover SOPs: drain, rinse, verify, refill—no “top-off and keep going”

WHERE MOST LINES LOSE HYDRATION EFFICIENCY: INCONSISTENT MECHANICS

In many plants, hydration inconsistency isn’t a “bean problem”—it’s a mechanics and handling problem:

  • Uneven fill and discharge creates segregation (small vs. large beans, broken vs. whole)
  • Poor drainage leaves residual water that dilutes the next batch and changes soak kinetics
  • Hard-to-clean surfaces drive longer downtime and rushed sanitation

This is where purpose-built soaking equipment matters. Hydration efficiency depends on repeatability.

Lyco Manufacturing’s continuous hydration solution consists of step cooking/blanching reducing hydration times. With over 850 units sold across bean, grain, and pasta operations, the design reflects decades of plant-floor feedback on what actually holds up.

Benefits of Continuous Dry Bean Hydration versus traditional soak tank systems are:


  • Continuous systems- are always first in/first out. Ensuring the beans are not shocked and split.
  • Improved Quality and Recovery– Lyco unique agitation increases quality with uniform hydration resulting in improved yields as each bean is processed the same. 
  • Reduces Labor and Water Usage– all our systems are automated with PLC controls for precise temperature controls and water usage this eliminates human error and produces a repeatable process. 
  • Save valuable floor space over traditional soak tanks. Reduces time for 10-12 (cold soak) to 35-60 minutes.
  • Reduced Sanitation– these systems have an optional CIP system for cleaning.
  • Small to High Volume Capacities– these systems can range as small as 1000 PPH all the way up to 15,000 PPH or more finished.


HOW TO MEASURE “IMPROVING DRY BEAN HYDRATION EFFICIENCY” (SO YOU CAN PROVE IT)

Hydration projects stall when teams can’t quantify gains. Use a small dashboard:

  • Soak pickup % (weight gain or moisture gain to target)
  • Within-batch variability (sampling at multiple points in the tank)
  • Split/blowout rate before and after cook
  • Cook time to tenderness (or texture metric) after soak
  • Water usage per lb of finished beans
  • Downtime minutes per sanitation cycle

Practical example: If hydration variability forces you to over-soak “to be safe,” you pay twice—more splits (yield loss) and longer cook correction (capacity loss). Tightening soak consistency often returns capacity without adding a new cooker.

DOWNSTREAM EFFECT: WHY HYDRATION SETS UP BLANCHING AND COOKING SUCCESS

Soaking is only step one. Your blancher and cooker performance depends on starting conditions.

  • Under-hydrated beans extend cook time, increase energy draw, and raise the risk of center hardness
  • Over-hydrated beans increase skins sloughing, solids in the water, and texture defects

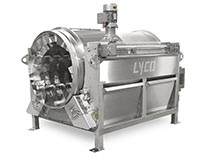
For continuous blanching and cooking where retention time control matters (2–60 minutes), a Rotary Drum Blancher can be paired downstream to stabilize cook results after consistent soaking. The drum design provides gentle agitation and uniform temperature—critical for beans that need controlled processing without mechanical damage.

PRACTICAL CHECKLIST: 7 FIXES YOU CAN EXECUTE THIS QUARTER

  1. Write soak “recipes” by variety and lot condition
  2. Lock in water-to-bean ratio and loading method
  3. Add temperature band control and multi-point checks
  4. Implement sampling plan for within-tank uniformity
  5. Standardize dump/drain/clean cycle times
  6. Track split rate and correlate to soak variables
  7. Align soak output to blanch/cook input capacity (stop starving or flooding the next step)

NEXT STEP

If you’re diagnosing inconsistent soak pickup, split rates, or throughput loss tied to hydration variability, we can help you map the process conditions and mechanical constraints quickly.

INDUSTRIAL SOUS VIDE PROCESSING EQUIPMENT: THE COOLING STEP IS WHERE PLANTS WIN OR LOSE

Here’s what most equipment searches miss: industrial sous vide isn’t about the water bath. It’s a validated thermal process plus package handling plus rapid cooling through the danger zone—all documented, all repeatable, all defensible under audit.

That’s why “industrial sous vide processing equipment” searches are climbing alongside ready-to-eat growth, pouch-packed meals, high-mix SKU counts, and FSMA verification demands. Plants are being asked to scale sous vide-style quality while proving time/temperature control, lot traceability, and cooling performance.

The plant-floor reality: most failures happen after cook—at cooling, accumulation, and pouch damage—because lines are running higher volumes with less labor and more pouch formats than legacy coolers were ever built to handle.

WHAT “INDUSTRIAL SOUS VIDE” ACTUALLY REQUIRES (IT’S NOT JUST A WATER BATH)

Walk the floor and you’ll see the equipment stack typically includes:

  • Cookers / hot water immersion or retort systems (product-specific lethality targets)
  • Hot-fill pouching (flexible packaging, multiple sizes, higher SKU churn)
  • Rapid pouch cooling (core temp pulled down fast, uniform, documented)
  • Post-cool handling (drying, case packing, cold storage, distribution)

In sous vide-style processing, cooling is not optional. It’s the critical control step that determines whether you can:

  • Pull product through the bacterial danger zone fast enough
  • Hold texture, emulsion stability, and fat distribution (soups, sauces, chowders, pet food gravies)
  • Reduce pouch swelling, seal stress, scuffing, and corner wear
  • Maintain line reliability under high-mix, high-volume conditions

THE BIG SHIFT: MORE POUCHES, MORE SKUS, MORE PROOF REQUIRED

Across North American food and pet food plants, three trends are forcing renewed scrutiny on cooling systems:

  1. POUCHED RTE AND “HEAT-AND-EAT” GROWTH
    Flexible packaging is expanding because it ships efficiently and merchandises well. Volume is up. Tolerance for defects is down.
  2. AUDIT-READY VALIDATION
    QA teams want verifiable time/temperature data, repeatability across shifts, and defensible HACCP documentation—not just “it worked.”
  3. LABOR AND SPACE CONSTRAINTS
    Continuous systems with smaller footprints are replacing static tanks, manual basket handling, and long deluge belts. Plants can’t staff the old approach.

That’s why interest is rising in continuous sous vide pouch cooling equipment, high-capacity pouch chillers, and validated rapid cooling for hot-filled pouches—even when the upstream cook step varies by product.

WHY TRADITIONAL COOLING METHODS STRUGGLE IN INDUSTRIAL SOUS VIDE LINES

STATIC TANK COOLERS

Common outcomes at scale:

  • Temperature gradients, dead zones, inconsistent core cooling
  • Manual handling, WIP accumulation, poor FIFO control
  • Limited documentation unless operators add extra steps

WATER DELUGE BELTS

Typical issues:

  • Long footprint, high water use, inconsistent pouch contact
  • Belt tracking problems, carryover, maintenance burden
  • Varying cooling rates across pouch sizes and fill weights

SPIRAL FREEZERS AS A “COOLER” WORKAROUND

Spirals have their place, but when used to solve a cooling bottleneck:

  • They may cool surfaces quickly while leaving core lag
  • They add complexity, sanitation load, and floor space costs
  • They’re not designed for water-cushioned pouch handling

WHAT TO LOOK FOR IN INDUSTRIAL SOUS VIDE PROCESSING EQUIPMENT (COOLING FOCUSED)

For pouch meals, soups, sauces, and pouched pet food, prioritize these criteria:

1) TRUE FIRST-IN/FIRST-OUT FLOW (FIFO)
FIFO isn’t marketing language—it’s what keeps cooling time consistent across the run, supports traceability, and prevents “short-cooled” pouches from reaching packaging.

2) HIGH HEAT TRANSFER, NOT JUST “MORE WATER”
Cooling performance comes from controlled agitation, full pouch contact, and uniform energy removal—not simply spraying more water at the problem.

3) GENTLE HANDLING FOR FLEXIBLE PACKAGING
Look for water-cushioned conveyance, minimized drop points, and reduced abrasion—especially with corner seals and high-fat products that show damage.

4) VERIFIABLE PROCESS METRICS
QA and engineering teams need the ability to validate:

  • Target exit temperature
  • Residence time distribution
  • Repeatability under SKU changeovers

5) FOOTPRINT, WATER, AND ENERGY REALITY
Plants are under pressure to reduce utilities while increasing throughput. Systems that cool faster in a smaller footprint change the economics.

WHERE CHILL-FLOW™ FITS IN THE DECISION

Lyco Manufacturing’s Chill-Flow™ approach aligns with what industrial sous vide lines need most at the cooling step:

  • Patented Hydro-Flow® submerged agitation for fast, uniform heat removal
  • Gentle water-cushioned handling to reduce pouch damage
  • True FIFO flow to support validation and consistent cooling
  • Configurable for a broad range of pouch sizes and production rates

If you’re building internal alignment, this is the decision framework: cooling rate + handling damage + FIFO control + documented repeatability.

PRACTICAL TAKEAWAYS FOR TEAMS STILL IN RESEARCH MODE

If you’re early in the process and not buying yet, start here:

  • Map your current process and note where pouches queue (WIP = risk)
  • Define what “done cooling” means: core temp, not surface
  • Audit for pouch damage sources: corners, seals, abrasion points, drop heights
  • Ask QA what documentation gaps exist for cooling verification

Get these answers before you spec equipment. They’ll drive the right conversation.